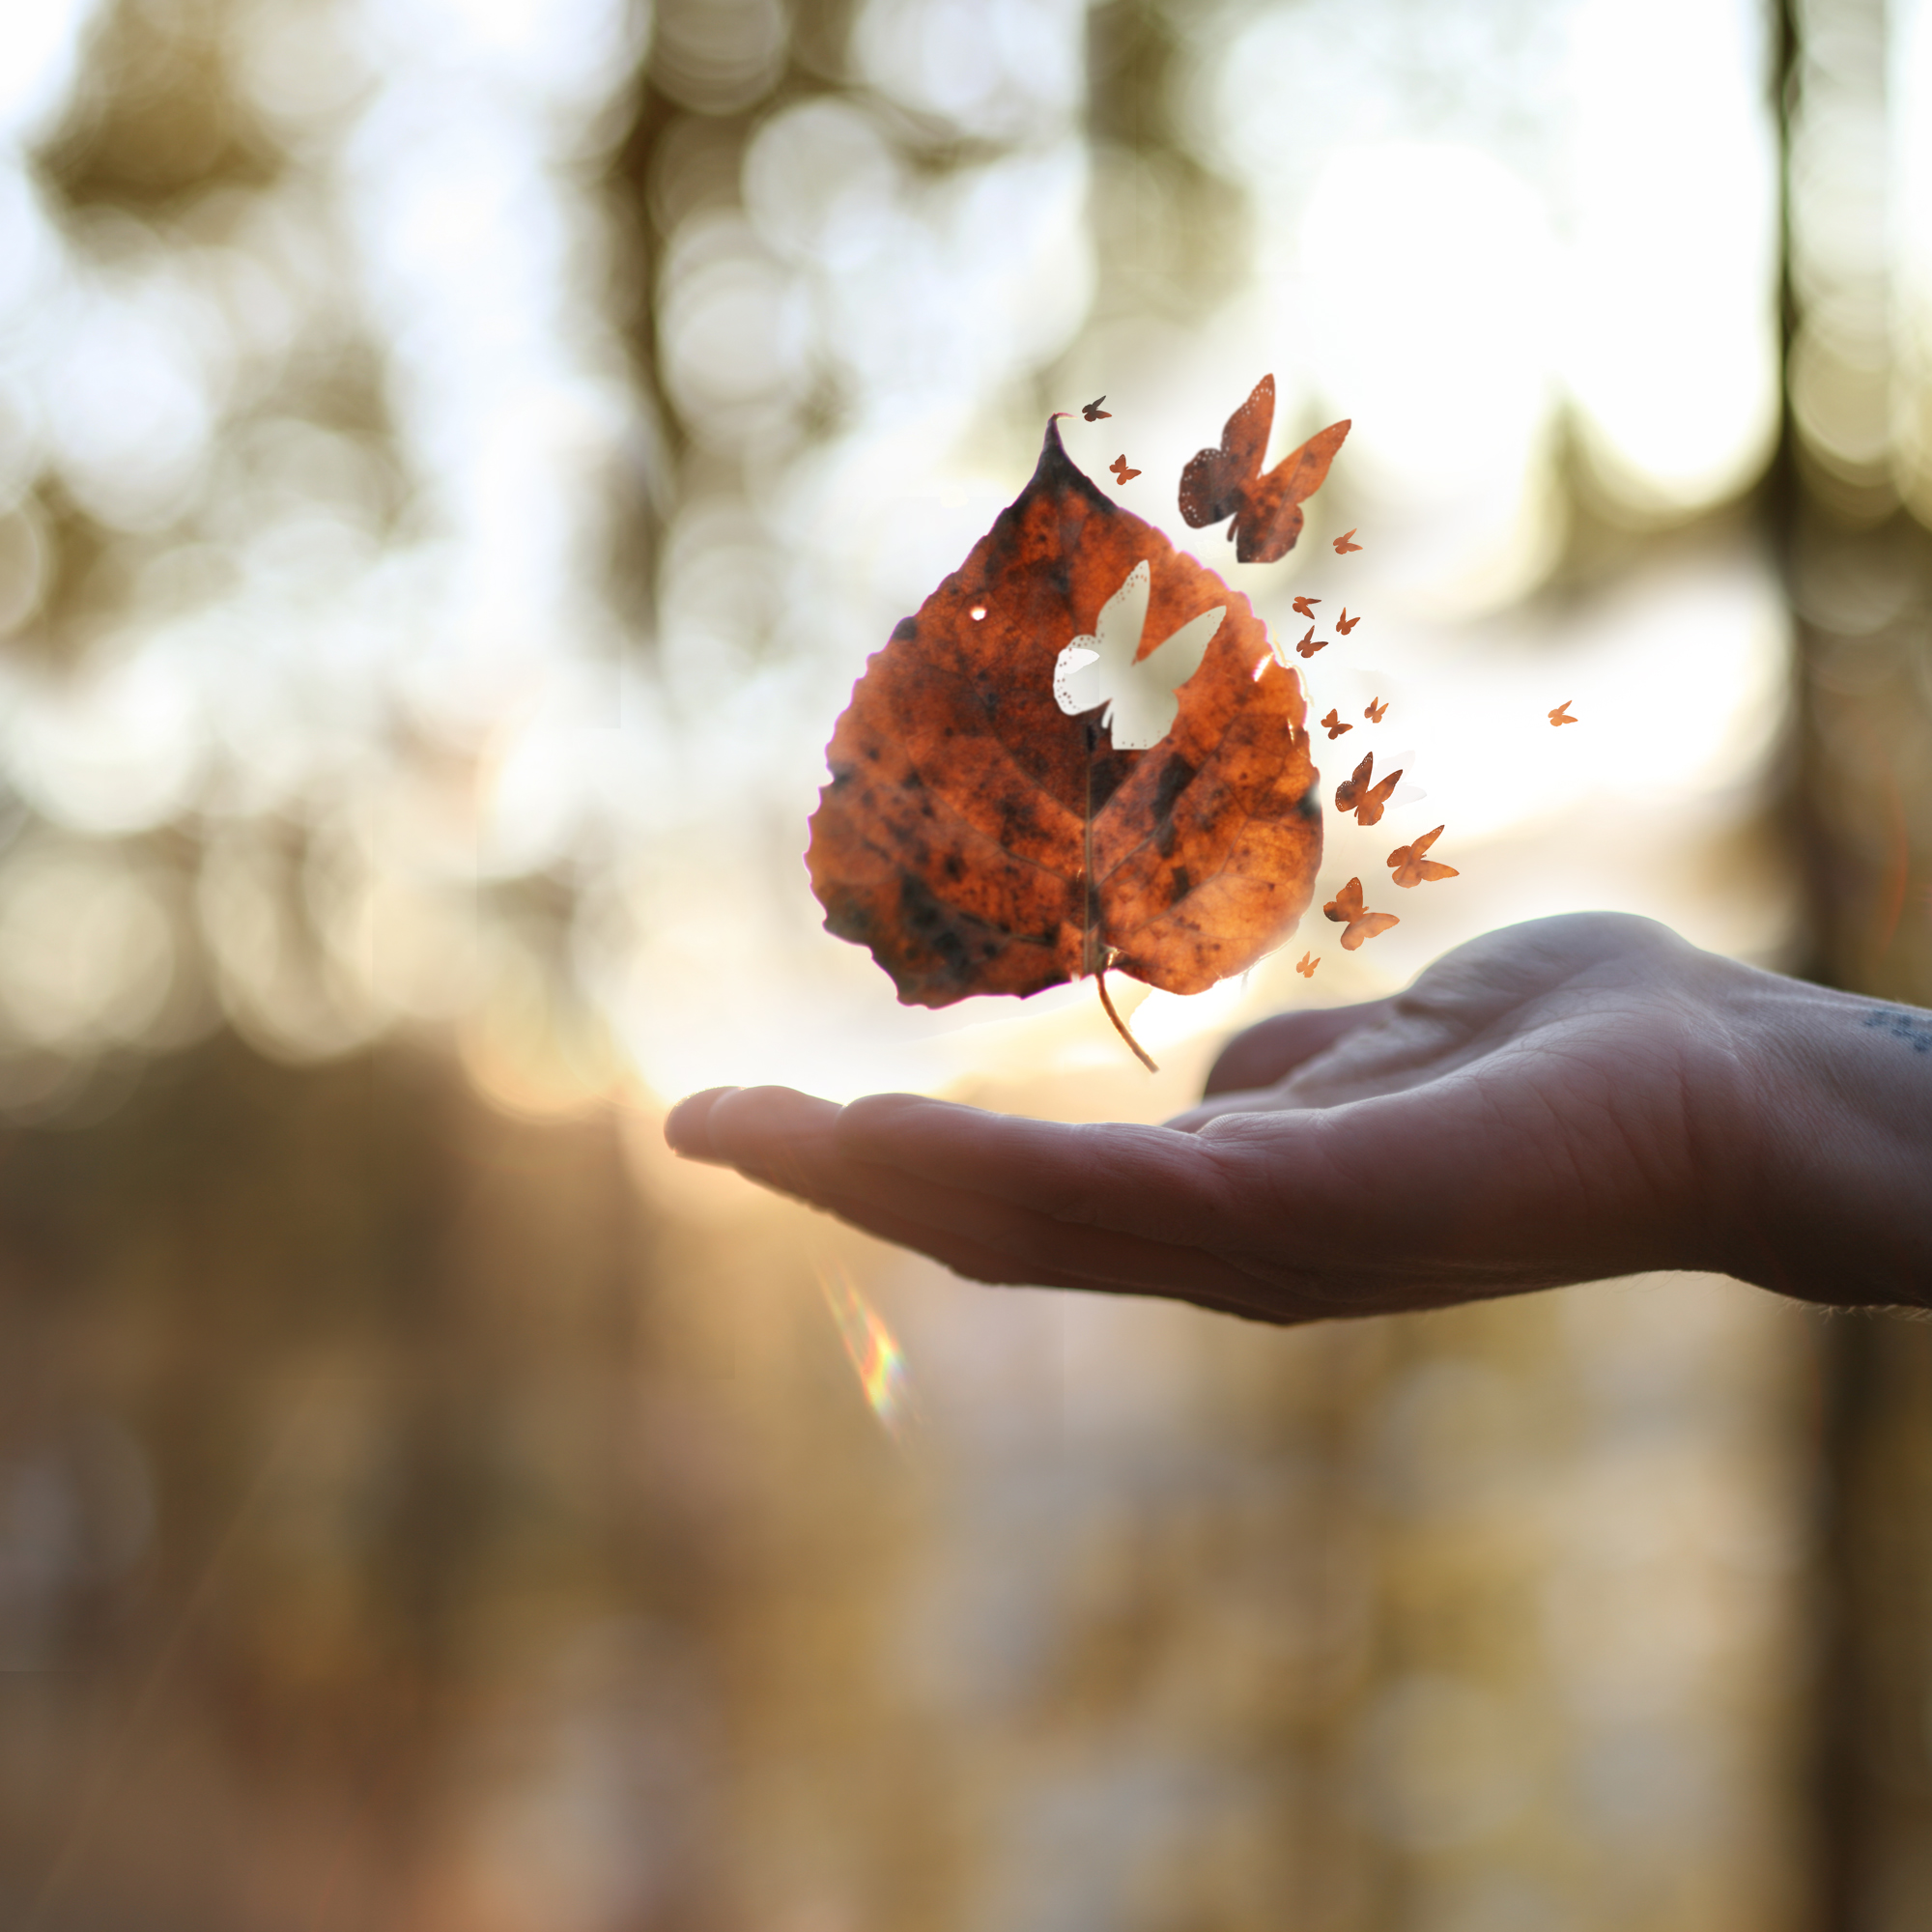
I’ve been planning this tutorial for a few weeks, ever since I took the last of my “leaf” images.
I saved all the different photos that I took for that image and decided that I would just use the same base photos to do another image, this time explaining how I did it. The same method applies to all the other leaf photos I’ve done, but if you have any specific questions please feel free to ask. Hopefully I can explain myself in a clear enough way!
Step 1:
Your photo! Here is the base image that I’m using (without the leaf for now). This image in itself is composed of 9 different photos stitched together to give a bigger canvas to work with. You don’t need to do that if you’re trying this out, but I did since I like lots of space. Aside from adding the images all together, this is straight out of the camera.

Step 2:
Adding the leaf. In theory you could use almost any thing leaf-like for this kind of image, like a piece of paper or fabric or even a feather…anything that is flat and would be able to disperse. I had a few different leaves to choose from, but I went with this one and just pasted it on as a new layer. It’s important to have your leaf or paper on top of the base image as a new layer, don’t merge anything until the last step!

Step 3:
This is where the fun part begins! For this image, I’m using a butterfly brush but for the other ones, I used bird brushes and leaf brushes. This is the creative part where you can choose what silhouette you want to use in your leaf. You could have a tree, a balloon, a cityscape…it’s up to you! You can easily find brushes of almost anything (try DeviantArt).
The first part of doing this step is to pick the brush that you want to use and then choose the clone stamp tool.  Select a sample of the leaf ( pressing alt and clicking on the part of the leaf you want to sample) then you point to part of the image you’d like to see that butterfly shape appear and just click your mouse. You should get a butterfly with a leaf texture. Now, using the eraser tool select the same butterfly brush and click the mouse once on the leaf to erase a clear butterfly shape.

Repeat this step using a variety of brushes and sizes. For this image, I did the cloning first and then went back and deleted the sections of the leaf. You can do as many or as little as you want. I always make sure that, using the eraser tool and the brush that I’m using, I erase the edge of the leaf, leaving little details like parts of wings. I also use the blur tool on low opacity just to soften the edges a bit.

(this is before erasing the butterflies from the leaf)
Step 4:
It looks pretty good even at this point but it needs a little bit of extra pop to give it the impression that the butterflies are actually coming alive and leaving the leaf (ha!) I looked through my brush collection and found this brush set (from deviant art) that is a set of paint splatter brushes. I tried it on a little bit of the leaf and it looked neat. I used the same technique as the butterfly step. Using the clone stamp tool, I used these splatter brushes (on a small size) and cloned the leaf texture near the edge of the leaf to make it appear that the leaf was breaking apart. You could use smaller butterfly brushes or other brushes if you like, I just thought that this worked pretty well.


Step 5:
The hard part is over, now you can tweak it to your liking! All I did for this after the brushwork was increase the contrast and brightness a bit.
I hope that made sense, if you decide to try this out I would love it if you leave me a comment or message so that I can see!


Ohhhh – the clone stamp tool! Genius!!!
I’ve done something like this before but with selections. It’s more of a pain that way.
Thank you for the tutorial Oh Great One! {g}
Unique and Powerful Male Artwork
Michael Taggart Photography
Great tutorial. Explains the steps very nicely. I do however have one question though…
You say the original photo of the trees and your hand is 9 photos stitched together to give a bigger canvas. I’ve done these Brenizer method shots before but always when I was behind the camera because of course you really don’t want things to move if you can help it while you snap all your shots to stitch together.
How did you manage to move the camera to capture the 9 images whilst keeping your hand still and in focus in the frame?
thanks 🙂
After I get the initial photo (in this case, my hand) I lock the focus on my lens to manual focus and then I can move things around if I need to.
OMG! Thank you for the tutorial! Awesome!
Thanks for this tutorial, it’s such a neat method!
Thank you Joel! I just started learning Photoshop in the last few weeks so it probably took me a little longer than most BUT I got it! You’re the best!
Love this one.. you done it in a very simple but in a beauty full manner .. 🙂
Excellent, very clear tutorial, thank you.
Great tutorial and I didn’t even think of using the clone stamp that way as I was trying to figure out how you went about doing…always trying to make things more complex than need so a great easy method.
My only suggestion would be more in depth of how you photographed the leaf and got it to look like it was floating there, as in where you holding the leaf with your hand and masked that out later in photoshop and then having to fix the stem as well… etc….
Thanks for posting your methods and I hope this is just the start to seeing more tutorials from you.
Thanks so much for sharing this Joel!
Thanks so much for the tutorial Joel. Very easy to follow!
Here is what I made of it!
https://www.facebook.com/photo.php?fbid=10150501897018784&set=a.10150346218343784.393589.598838783&type=1&theater
great tutorial ( I understood it even I´m german).
but which programm did you use?
brilliant i m going to try this thanks a lot…for this tutorial……
Thank you for a brilliant tutorial, again it was another light bulb going on experience “the clone tool” doh ! !
hope you make more tutorials and love your photo stream at Flickr
Really great tutorial! Thank you so much!
I decided to try out the whole leaf in hand thing like you did -http://www.flickr.com/photos/photopluto/6489213369/in/photostream
Again, thank you! I’m definitely going to use this technique for lots of things. 😀
Such a brilliant tutorial Joel!
Very informative and inspirational, love your work.
Thank you so much, I was really excited to find your blog and tutorials.
I enjoyed trying this leaving butterflies. Sorry, it was a quick try because it was late in the night. I began with one idea, and in the end I finally did it with photographs at home.
I admire your photographs, which I follow at flickr, and your great creativity.
You can take a look at:
http://www.flickr.com/photos/9186065@N02/6772807746/in/pool-446602@N22/
Thanks again!,
Catalina
Don’t know whay happen with what I wrote you yesterday, has dissapeared.
Anyway.
Thank you for your kind tutorial. At first, I had an idea, but at I ended trying the tutorial (I enjoyed doing it) with two photos I shot at home with flash. It was a quick try, but enought to understand how it works.
Thanks for all your photographs, artworks by themselves.
Keep inspiring us.
If you’d like to take a look,
http://www.flickr.com/photos/9186065@N02/6772807746/in/photostream
Catalina.
this is brilliant! I used it to create this:
http://www.flickr.com/photos/64263389@N05/6982138181/
[…] Playing with leaves tutorial – Photoshop Tutorial alert! I’ve been wondering how to do this ever since seeing this “Metamorphis” set by Laura Ferreira! […]
I was inspired by these leaves for one of my projects for school. i ended up individually lassoing and moving every piece instead of using the clone and eraser stamp because i wanted a different look. Here is the link:)
http://www.flickr.com/photos/meghaljanardan/8127747155/in/photostream
[…] love this so much. I’m really proud of this. I found the tutorial on Joel Robison’s blog. I would recommend checking it out! I found the brush here on Deviant Art! I really like […]
Thanks a whole lot for writing this tutorial!
If not i would have spent my entire holidays cutting and pasting little parts of the leaf haha.
Here’s my result: i hope you like it!
http://www.flickr.com/photos/wimpycup/8330794033/
DUDE! you´re my hero! my inspiration i really love your work, i wish one day i could be as awesome as you are! i´m your devoted follower now!
Reblogged this on My World.
This is so cool! Definitely going to give it a spin~